Resizing a VirtualBox virtual disk
This is a tutorial for increasing the maximum size of a dynamically allocated virtual hard disk in VirtualBox. There are two steps:
- resizing on the host machine and
- resizing on the guest (virtual) machine.
Before you begin, consider backing up your virtual machine by copying its entire directory somewhere safe. I’ve found the existing tutorials either lacking or destructive. I prefer working in the command-line, but there seem to be some easy ways to corrupt things that way in this process, so I stick to GUIs here.
I believe the first part applies to all host operating systems, but I used macOS. The second part is definitely for Ubuntu.
Resizing on the host machine
- Open VirtualBox. Make sure the virtual machine (vm) in question is shut down (no saved states either).
- Navigate to
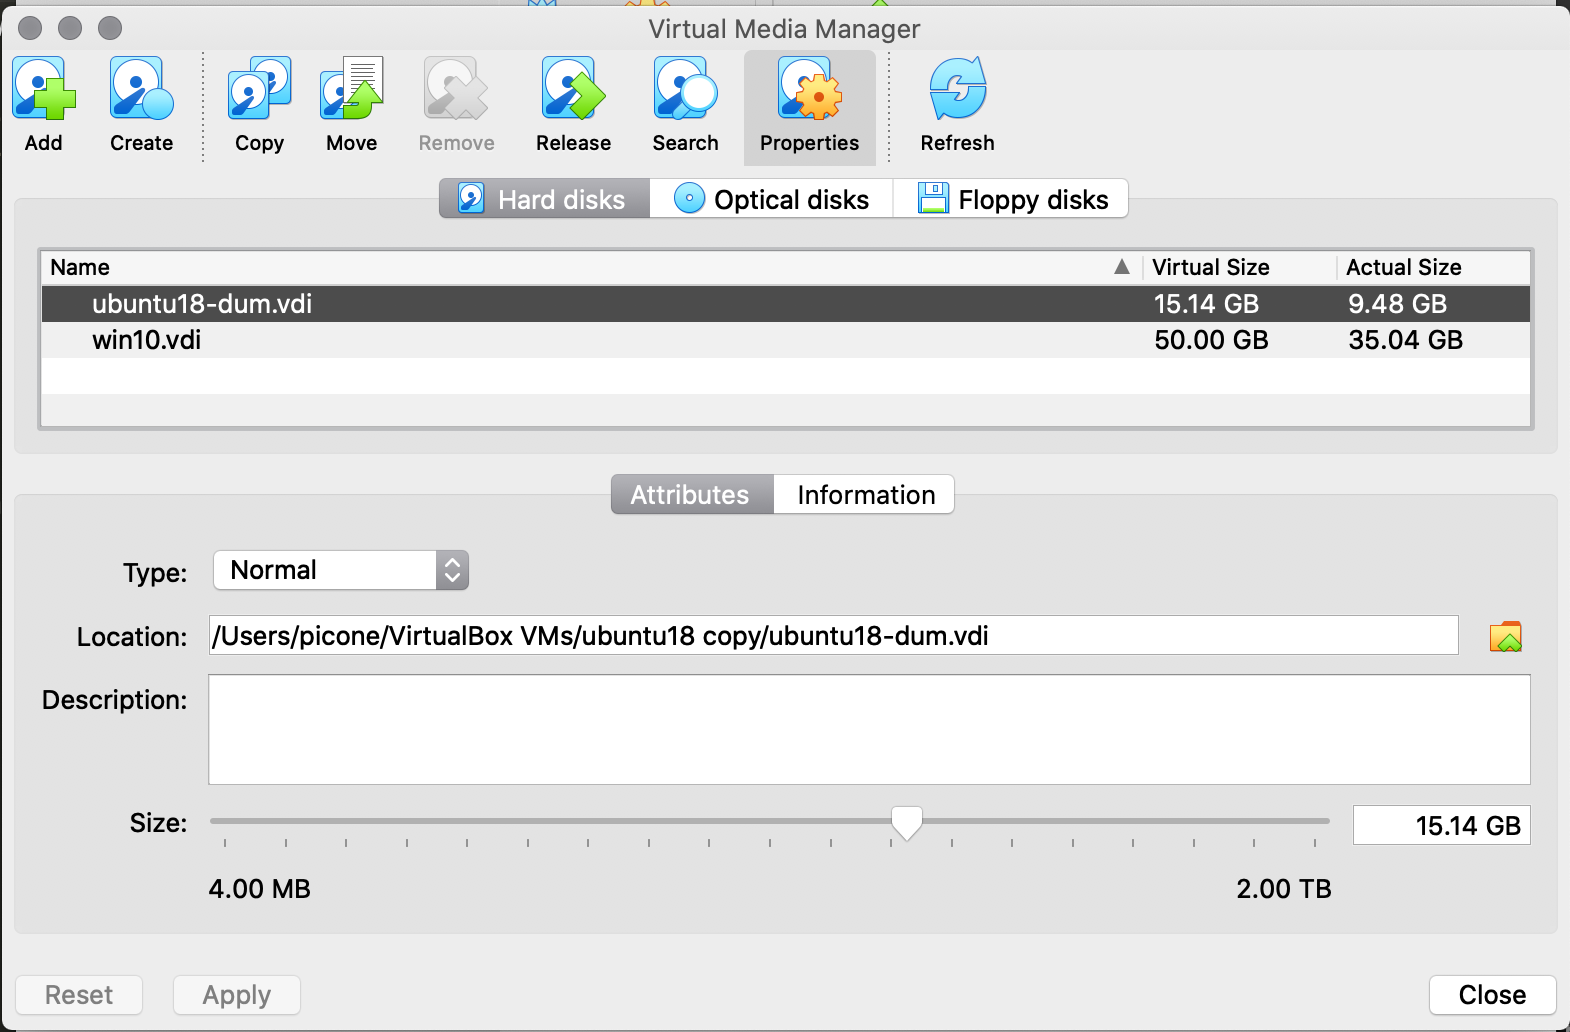
File > Virtual Media Manager .... It should open under theHard diskstab. - Select your vm’s
.vdifile and (if it’s not already displayed), select thePropertiesicon at the top. - You should see a slider bar, as pictured below. Increase the size by dragging to the right. (Btw, you can’t use this process to decrease the size, apparently.)
-
Applyand close.
Resizing on the guest (virtual) machine Ubuntu
The resizing above added another partition to the virtual hard disk, but your guest (virtual) machine Ubuntu doesn’t know how to use it yet.
- Launch your vm.
- From the Ubuntu Software Center, install the app GParted.
- Launch GParted.
- Select your main partition.
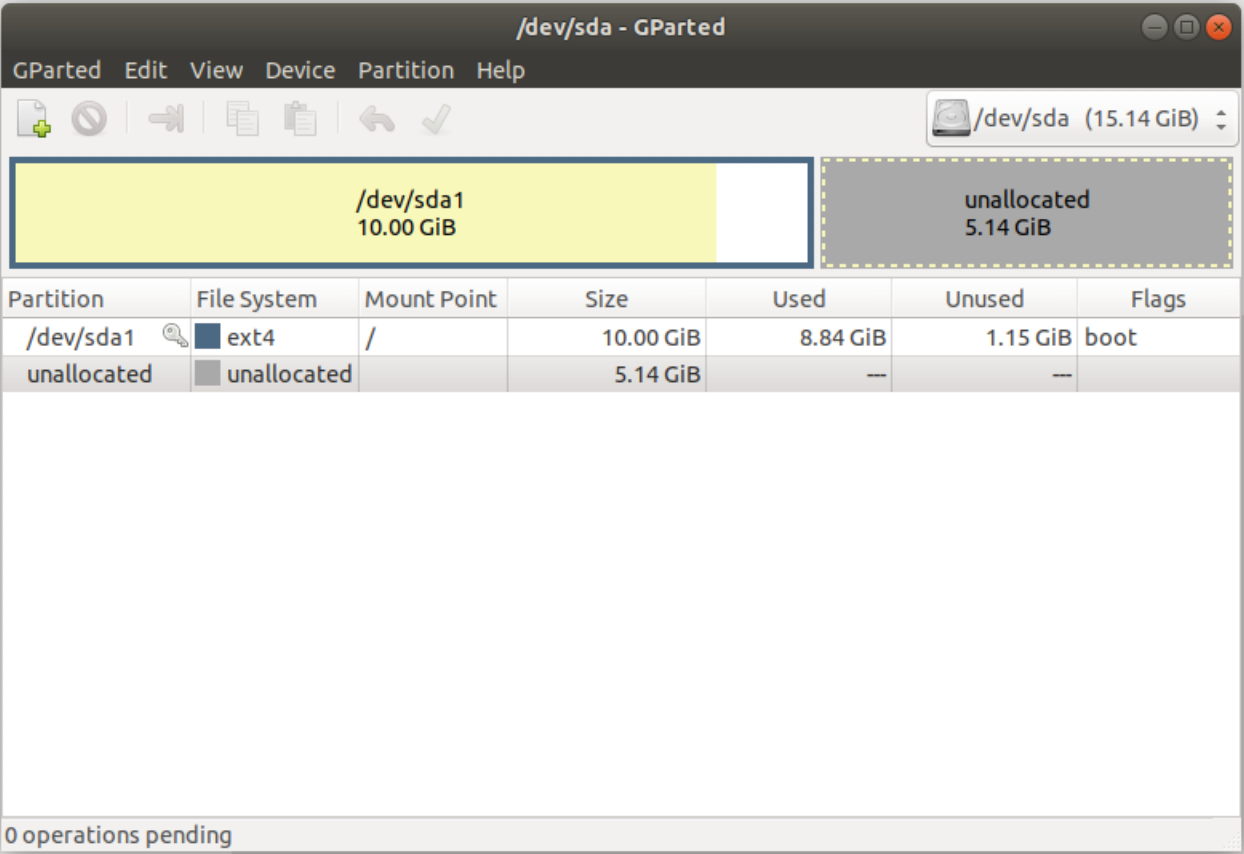
- Click the button
Resize/Move the selected partition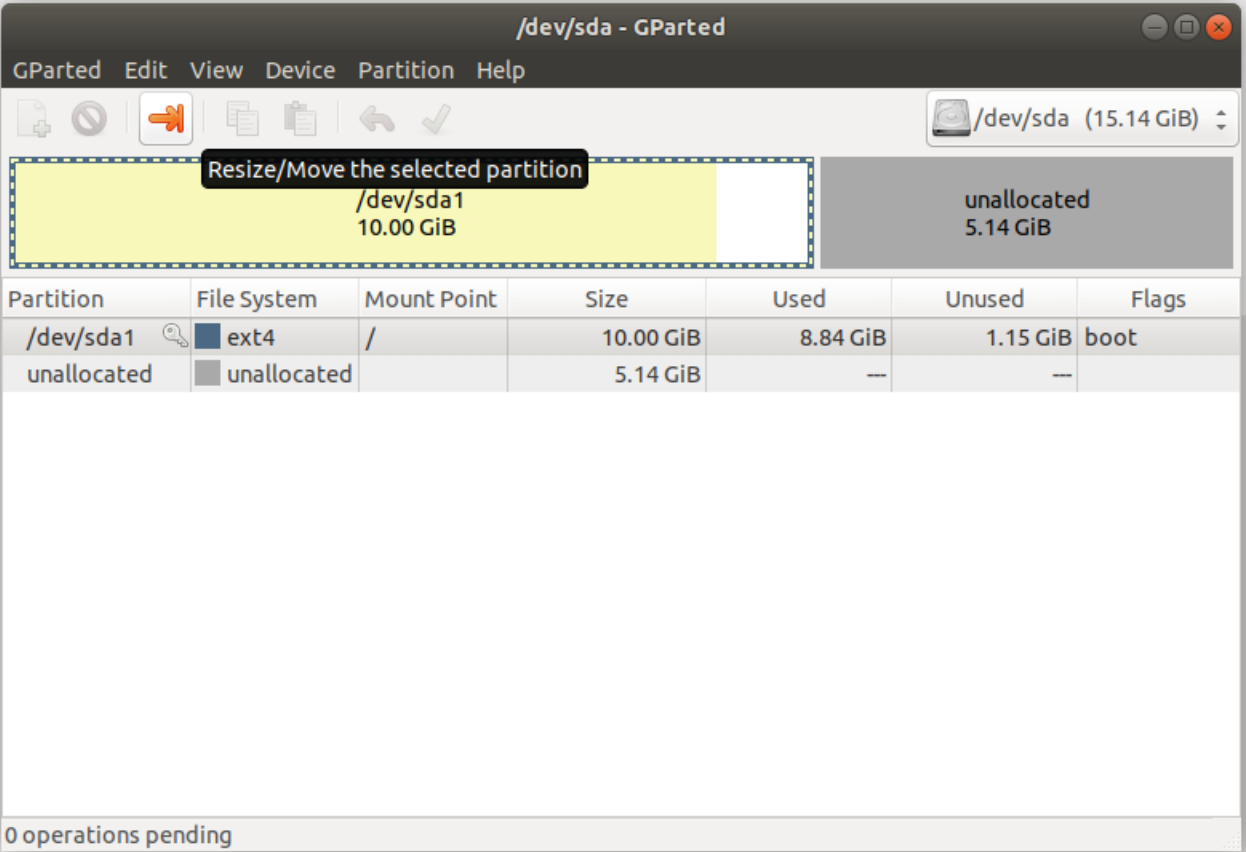
- Drag the slider all the way to the right and click
Resize.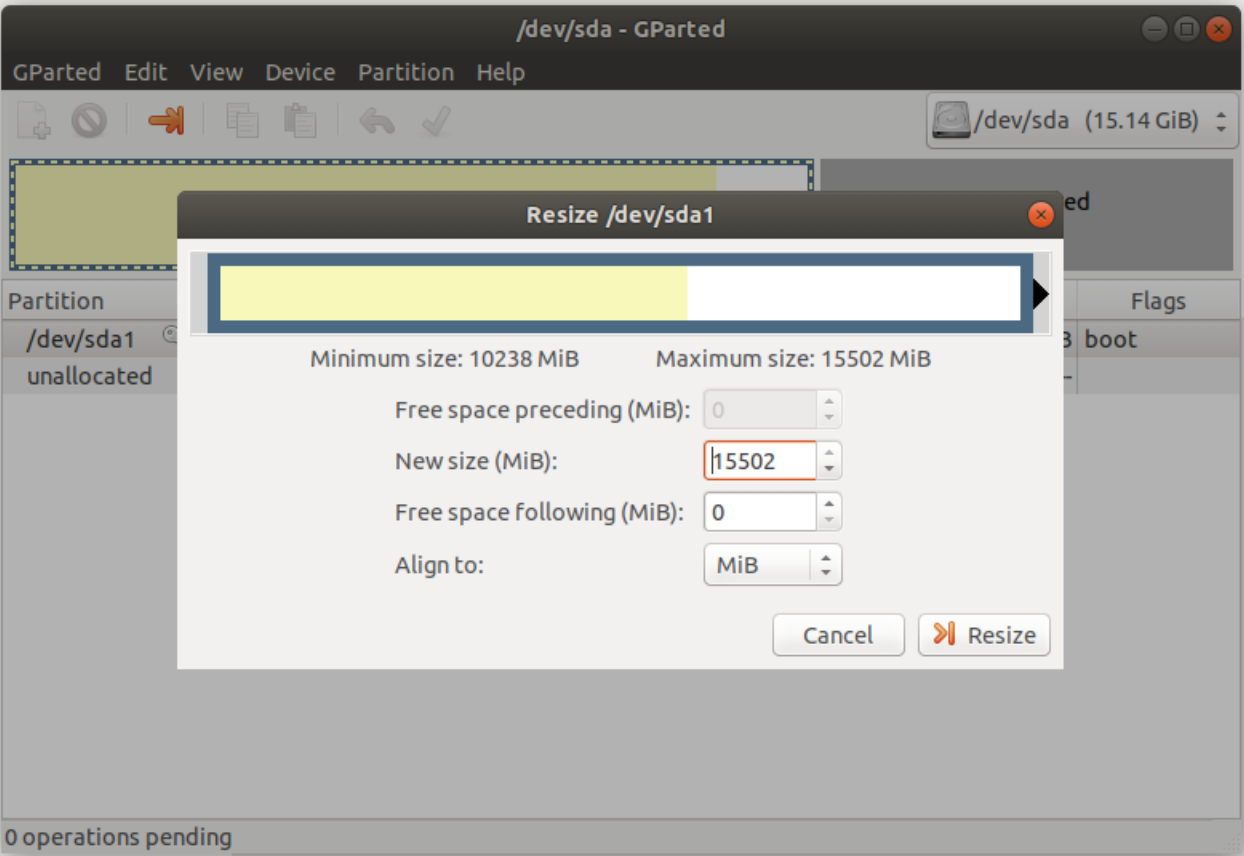
- Click the check mark to
Apply All Operations.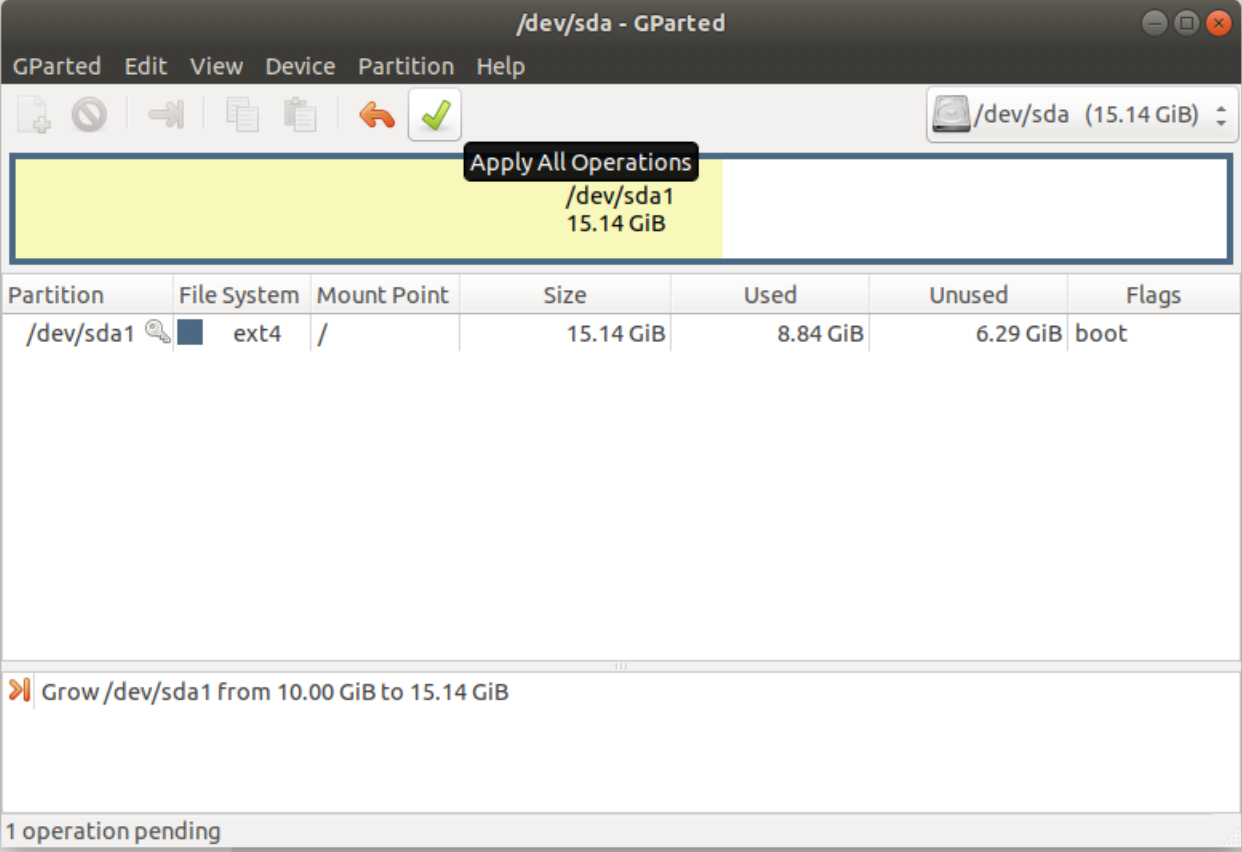
You’re done! Check that the size has increased in the file browser.