Panopto videos via Moodle
- Recording a Panopto video
- Uploading to Panopto’s web servers
- Editing your video with Panopto
- Making your video available on Moodle
- Students viewing videos
This is a tutorial for my SMU colleagues on recording lecture videos, uploading them to Panopto, and sharing them via Moodle (hosted by Panopto). It’s meant to be quick-and-dirty.
Here’s a four-video YouTube playlist to accompany this tutorial.
Recording a Panopto video
This section corresponds to the YouTube video below.
Panopto has three recording options:
- the Windows app,
- the MacOS app, and
- the web app.
They all have pretty much the same functionality, but the web app can’t live-stream.
You can also record a lecture with another app, such as Screen Flow. Panopto is really more about content delivery than capture, but it does both.
Get started with Panopto
Here’s how to get started with Panopto.
- Go to: himse.hosted.panopto.com.
- Sign in with Moodle (from the dropdown). Enter your Moodle credentials. Think of this page as your home-base for everything Panopto-related. I’ll call it
Panopto Home. - If you don’t have a green
Createbutton at the top of the page, first provision any of your Moodle courses with the following guide. - Click the green
Createdropdown at the top of the screen and selectRecord a new session. - Download Panopto (Windows or MacOS).
- Install Panopto from the download.
- Open the Panopto app.
- Click the
Sign Inbutton. - Enter the server
himse.hosted.panopto.comand clickGo. - Enter your Moodle credentials.
Your first recording
- You’re now ready to record a session with the
Create New Recordingbutton. - You can capture multiple sources (video/audio) at once. Try setting your
Primary Sourceto your webcam and yourSecondary Sources>Secondary 1to your computer’s display. - Under
Folder, select a Panopto folder (these are on the cloud!). Popular choices include:My FolderandCourse Whatever. If you want to edit your recording before making it available to students, chooseMy Folder. - If you want to capture your PowerPoint slides, check the
Record PowerPointbox. -
Record! - Try out your audio,
Pause/Resumefor fun, and finallyStop. - Name your session and enter a description.
- Click
Uploadto upload to the Panopto (cloud) folder you chose.
Using Panopto Capture (web app)
From the “Create” dropdown above, there is also the Panopto Capture option, which is a web app for recording your lectures. If you choose this, you can’t live-stream, and you must use one of the web browsers: Chrome, Firefox, or Edge. It works pretty much the same as the Windows and MacOS apps.
Uploading to Panopto’s web servers
If you have recorded using a Panopto app, the recording will automatically upload to your Panopto folder of choice – go ahead and skip ahead to Editing your video with Panopto, below. If you recorded to your computer in some other way, upload it to Panopto with the following process.
- Go to: himse.hosted.panopto.com.
- Sign in with Moodle (from the dropdown). Enter your Moodle credentials. Think of this page as your home-base for everything Panopto-related. I’ll call it
Panopto Home. - If you don’t have a green
Createbutton at the top of the page, first provision any of your Moodle courses with the following guide. - Click the green
Createdropdown at the top of the screen and selectUpload media. - Select the Panopto cloud folder from the dropdown. Popular choices include:
My FolderandCourse Whatever. If you want to edit your recording before making it available to students, chooseMy Folder. - Upload the video file from your computer.
- It will now appear with your other recordings in the folder you selected.
Editing your video with Panopto
This section corresponds to the YouTube video below.
- From your
Panopto Home(login here: himse.hosted.panopto.com), navigate to video you’d like to edit, and click on it. This gives you a view similar to what the students will see. - In the upper-right click the
Editbutton, which is pictured below with the icon in darker gray.
- In this view, you can edit-away. See this Panopto page for details.
- When you’re done,
Apply.
Making your video available on Moodle
This section corresponds to the YouTube video below.
The first time
With a fresh Moodle course, we want to add the Panopto block to Moodle. There are good instructions for doing this here. If you see it, Provision Course.
Thereafter
The Panopto block added above is available in a student’s view; however, I don’t think it’s particularly useful since we can’t edit the organization and appearance of videos very easily in this block. Therefore, I recommend making your videos available to students as follows.
- On the Moodle page,
Turn editing onin the usual way. - Find a Topic or Week to which you would like to add a video. Click on that element’s
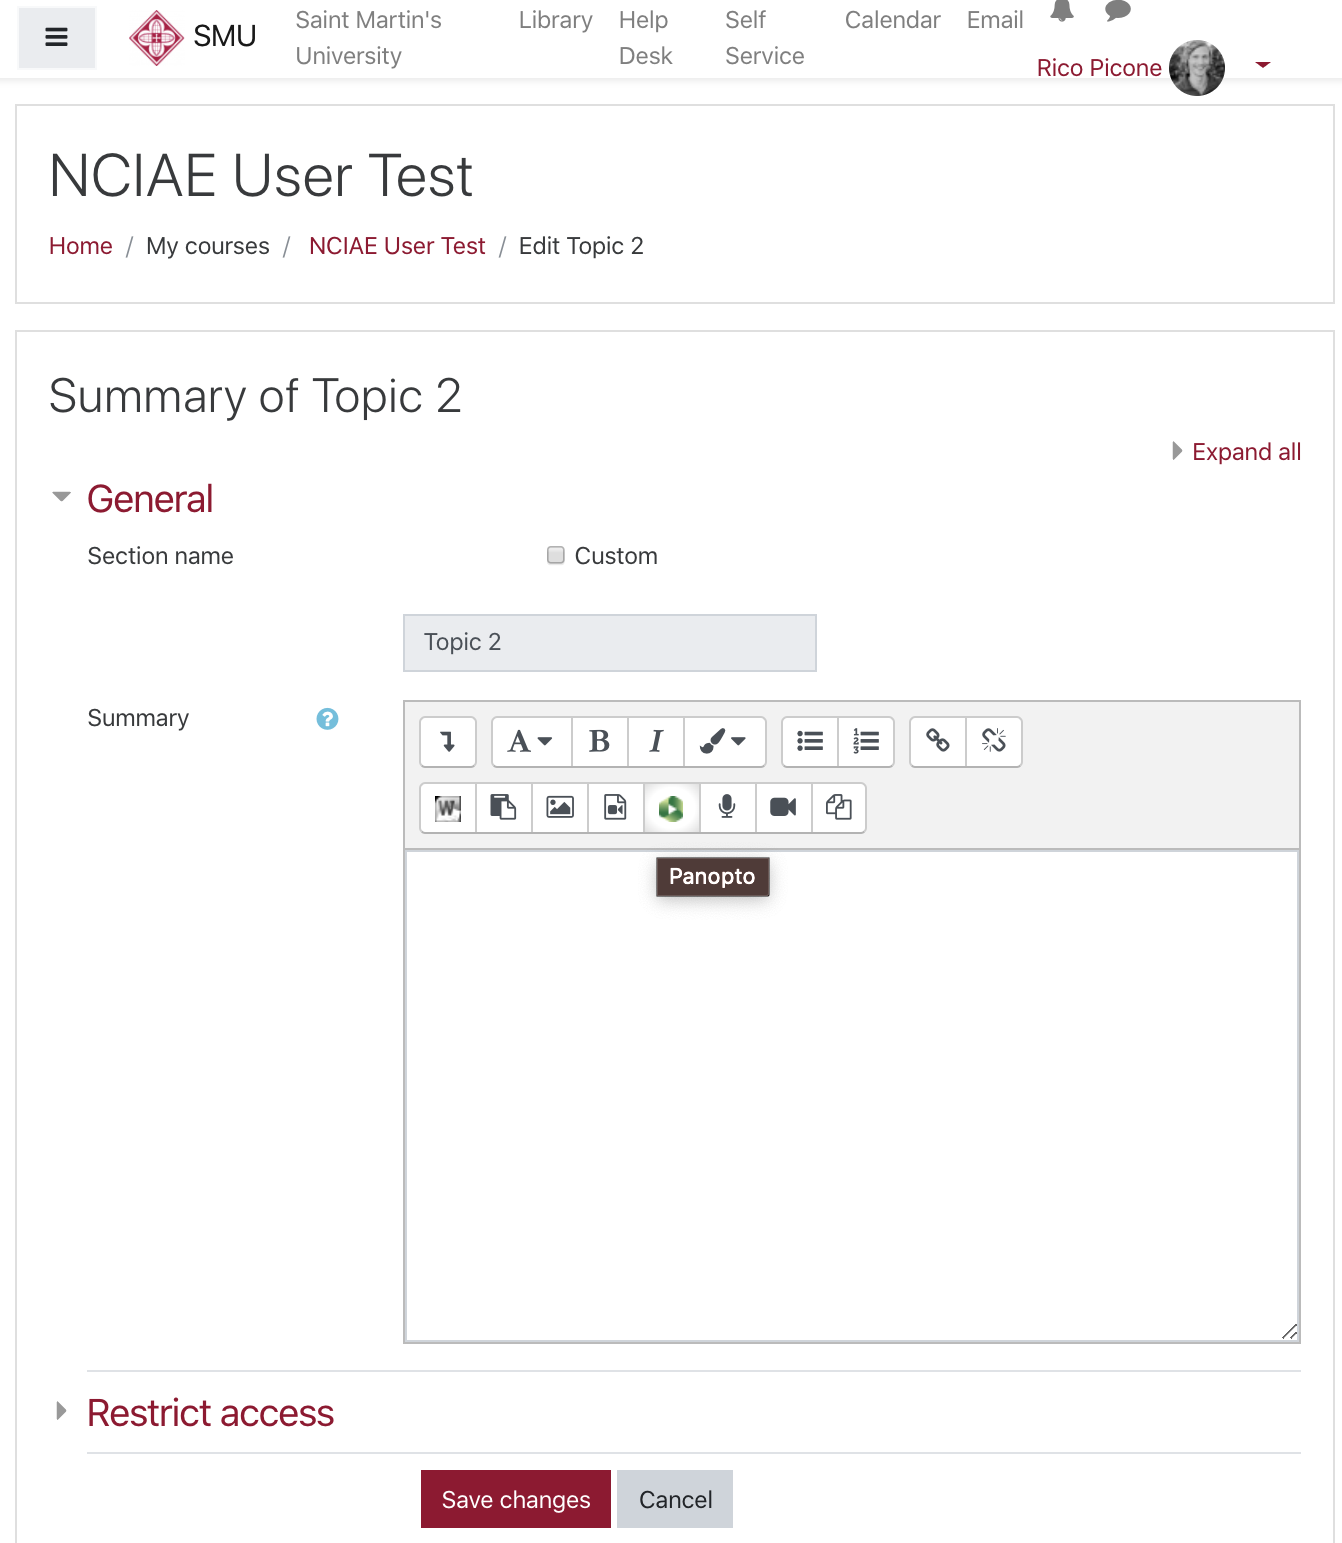
Edit>Edit topic. - In the view below, add some text if you like, then insert a video by clicking the
Panoptobutton (green icon).
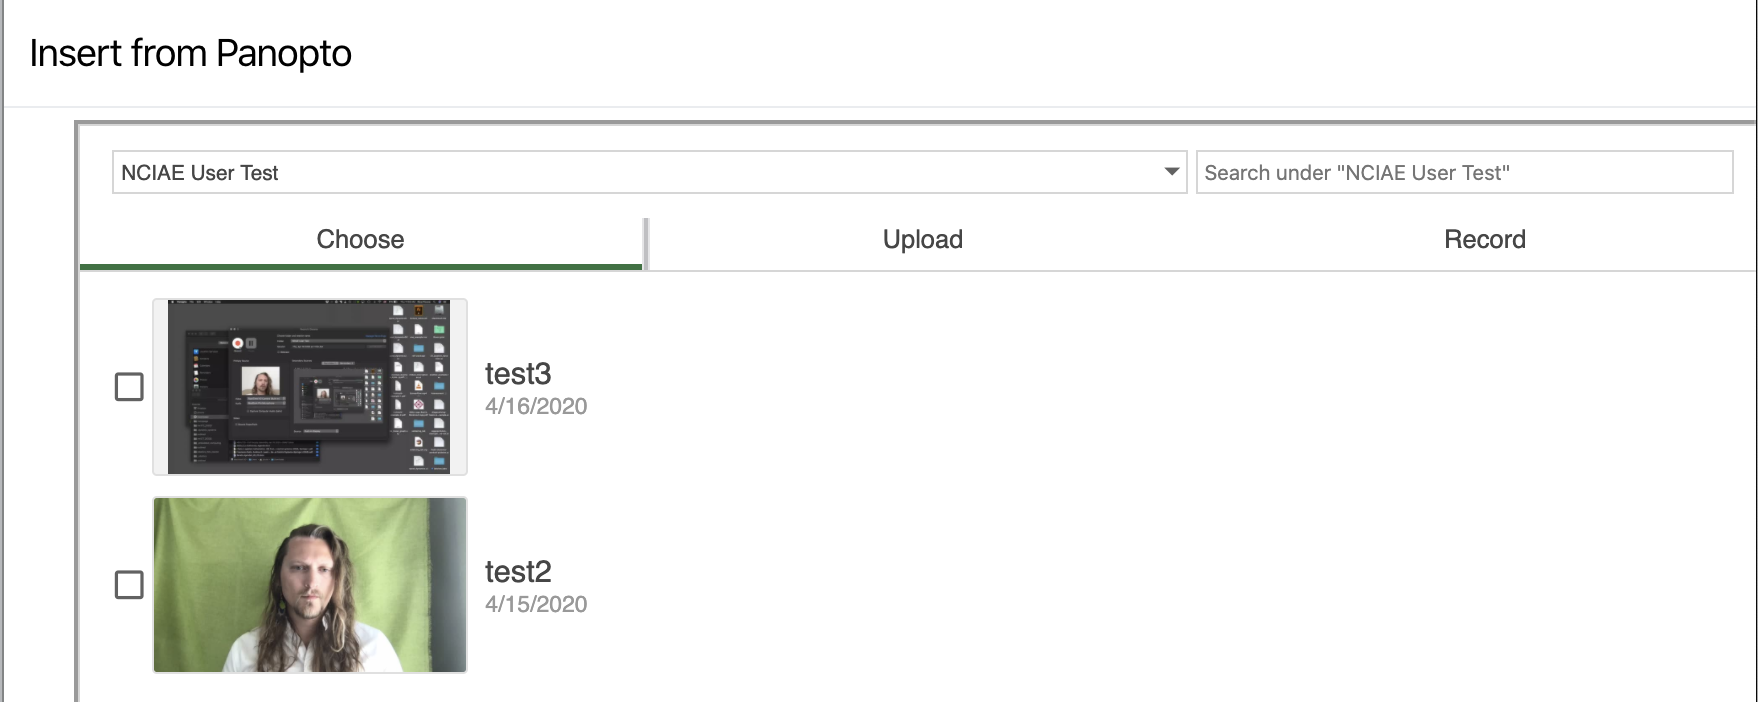
- There are three tabs:
Choose,Upload, andRecord, as shown below. If you have already uploaded your video to Panopto, it should be available inChoose(you may need to change folders). You can also upload a recording from your computer withUploador create a new recording withRecord. Assuming you’ve previously recorded and uploaded your video, select it (or multiple) and clickInsert.
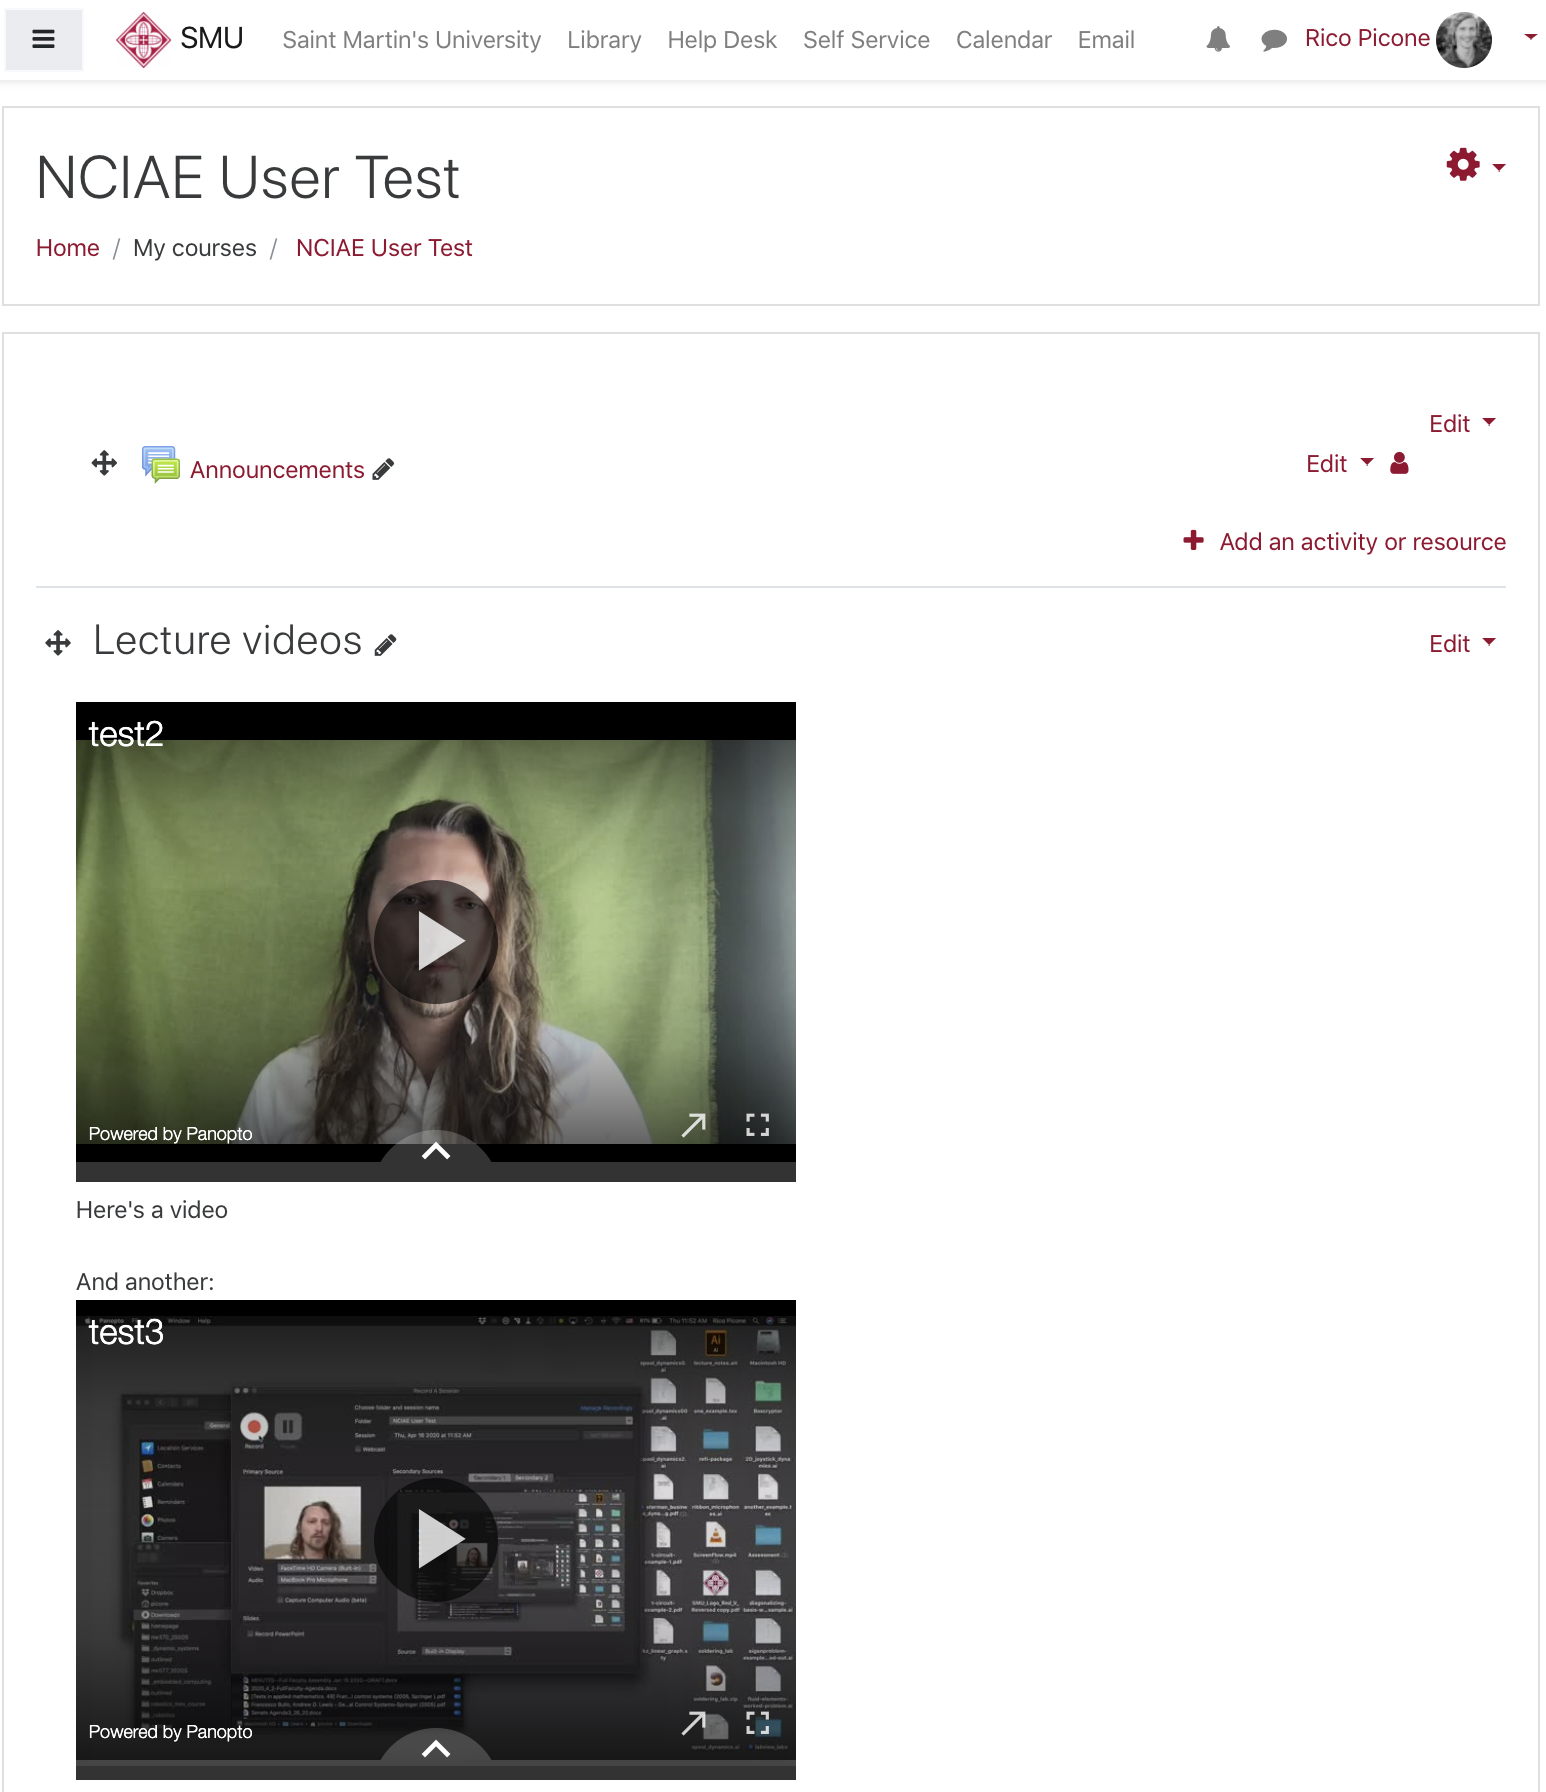
- Save changes to the Topic/Week and view it on the main course page.

Adding videos to Moodle elsewhere
Similar steps can be used throughout the Moodle site, wherever a text editor is available. For instance, you can add a new page with + Add activity or resource>Page that includes videos.
Students viewing videos
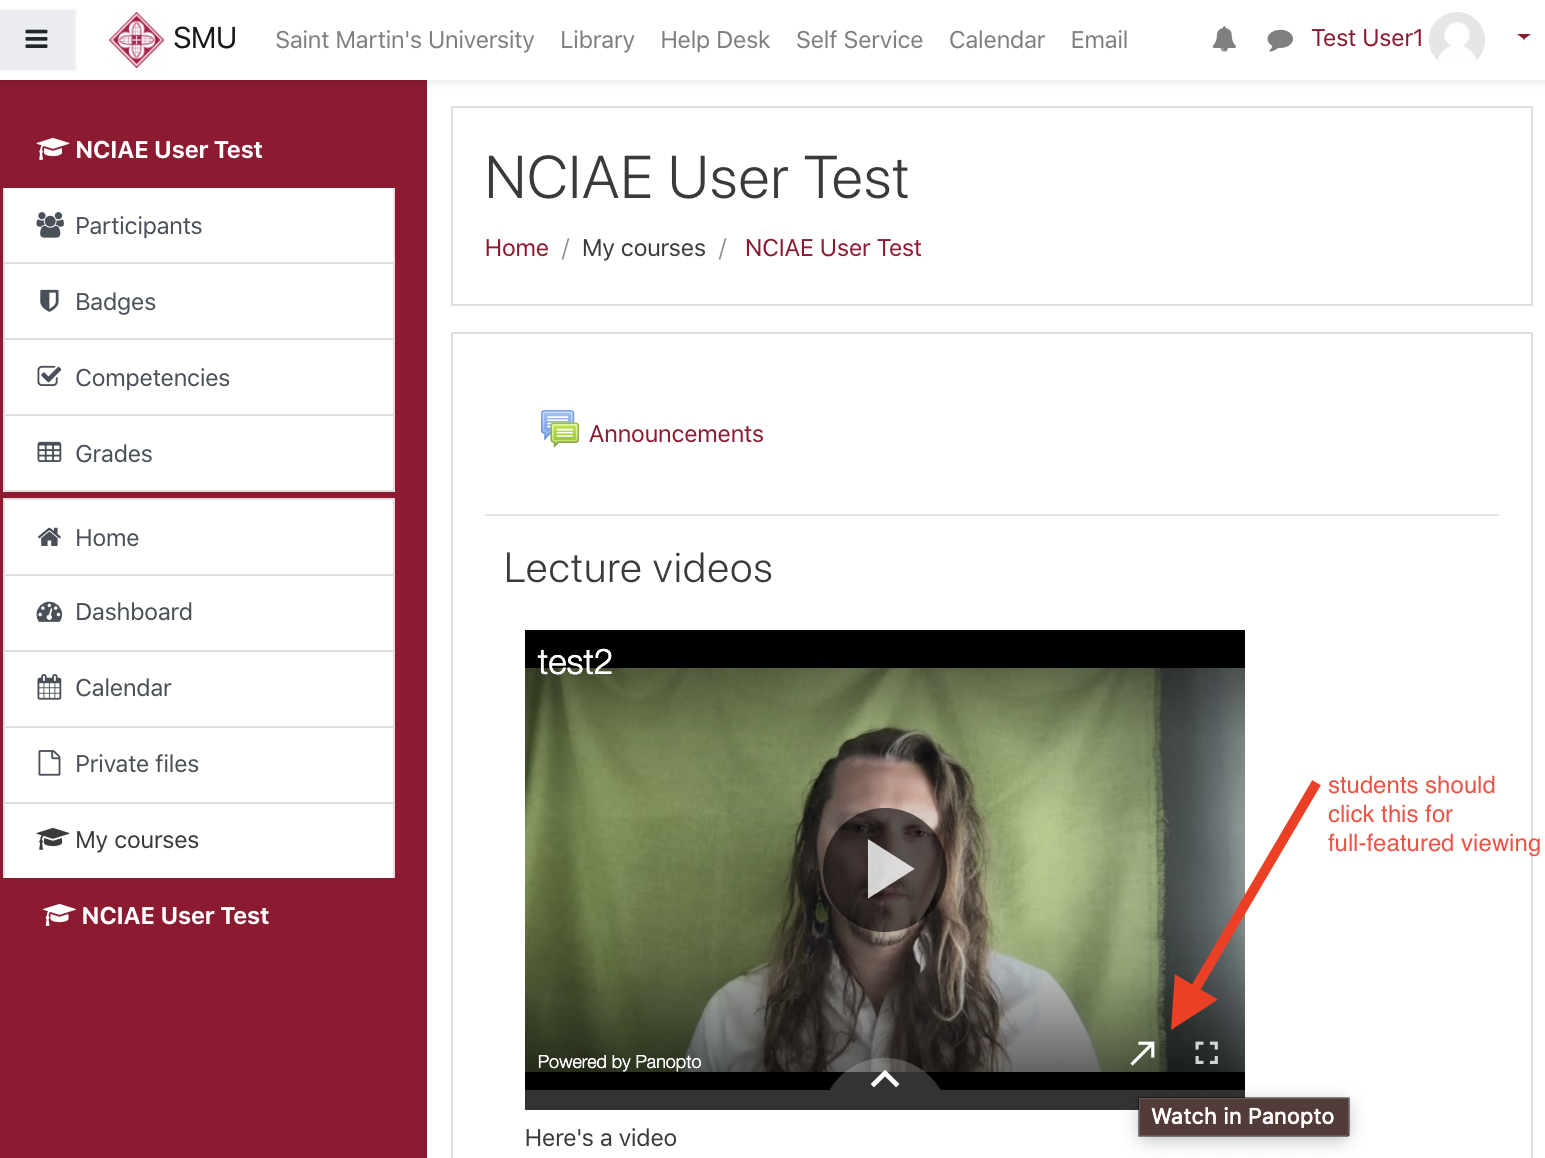
When a student views the video, it will look like the following. They can just watch the video embedded right here, but encourage them to click Watch in Panopto for full-featured viewing.
